Is it who or whom? You and me — or…
3 Fun Ways to Learn About the Butterfly Life Cycle
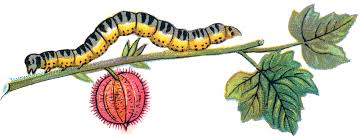
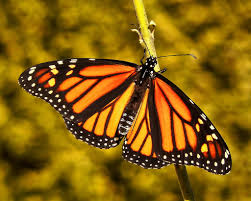
With their varying shapes, sizes, colors, and patterns, butterflies have long captured the interest of children. Equally as captivating is the transformation, or metamorphosis, each butterfly endures to become the delicate and graceful insects we love. The butterfly life cycle is comprised of four different stages, each of which differs greatly in purpose and appearance from all other stages.
From the egg to the caterpillar, and chrysalis to adult, learning about the life cycle of a butterfly is exciting for children of all ages. The following activities will help your child master the cycle without sacrificing the fun:
 Butterfly Life Cycle Plate Craft
For this project, children will learn the stages of the life cycle using items that can be found around the house. The supplies needed are:
- A paper plate
- A marker
- Green construction paper
- Glue
- Dried white beans
- Dried pasta: rotini, small shell, and bowtie
Using the marker, have your child divide the paper plate into four sections. Next, take the green construction paper and cut it into four leaf-shaped pieces. Glue one leaf into each of the four sections on the plate.
On the top left leaf, glue a few of the white beans. In the top right leaf, have your child glue a piece of rotini pasta. In the bottom right section, glue a piece of small shell pasta. In the final section, glue one piece of bowtie pasta.
Once the glue has dried, have your child label each section with the matching life cycle stage: 1.) Egg, 2.) Caterpillar, 3.) Chrysalis, and 4.) Butterfly. If your child is feeling creative, have them decorate each section by adding trees, the sun, or even other insects!
Butterfly Life Cycle Cup
This next activity takes a unique approach to teaching the cycle. You’ll need:
- 2 clear plastic cups
- Colored paper
- Glue
- Printed clip art
- Scissors
Start by printing and cutting four pictures of a butterfly, one at each stage of the life cycle: an egg, caterpillar, chrysalis, and butterfly. Next, tape all four pictures to the inside of plastic cup #1 with the pictures facing outwards.
Using glue, cover the entire outside of plastic cup #2 with your colored paper, leaving an uncovered window that is large enough to display one picture (tip: use one of your printed pictures as a template to make the window the correct size). Once this is complete, stack your cups together, placing the cup with pictures inside of the paper-covered cup.
Have your child spin the bottom of the inside cup around, allowing each of the life cycle stages to show through the window one at a time. Spend time discussing each stage before spinning to the next.
Online Butterfly Life Cycle Games
If you find yourself lacking craft items or the time to undertake a more hands-on project, don’t fret. There are a number of butterfly life cycle games available online for your child to play and explore. Whether at home, in the car, or at school, they’ll have the opportunity to learn the cycle’s corresponding steps and vocabulary through an interactive and engaging medium.